How To Glue A Puzzle To Preserve Your Artwork (2025 Tips)
Find the best way to glue your puzzle for display and framing. Easy step-by-step instructions for a seamless process.
Author:Celeste PearlReviewer:Kelly HayesJan 04, 202521.9K Shares487.5K Views
You've conquered that challenging puzzle and now you want to preserve it for years to come. Gluing your puzzle is a great way to do this! It not only protects your masterpiece but also turns it into a beautiful piece of art that you can proudly display on your wall or gift to someone special.
Whenever you want to show off your accomplishment in your living room or pass it down to future generations, gluing your puzzle is the perfect way to keep it safe and intact. This guide will walk you through the entire process, from gathering the necessary supplies to applying the glue like a pro.
Why Glue A Puzzle?
Before you begin, it's important to understand why gluing a puzzle is worth the effort.
- Keepsake or Gift: Completing a puzzle can be a special experience, especially when it holds sentimental value. Maybe you worked on it with family, or it features a meaningful image. Preserving your finished puzzle is a great way to cherish that memory.
- Home Décor: A glued puzzle can become a unique piece of art for your home. Once framed, it can add personality and charm to any room, acting as both a decorative piece and a conversation starter.
- Puzzle Preservation: Gluing your puzzle ensures that all those hours of effort are preserved. It keeps the puzzle from falling apart and maintains its integrity long after the pieces are interlocked.
Tip: For younger minds, puzzle games for kidsoffer a fun and educational way to develop problem-solving skills and creativity.
Materials Needed To Glue A Puzzle
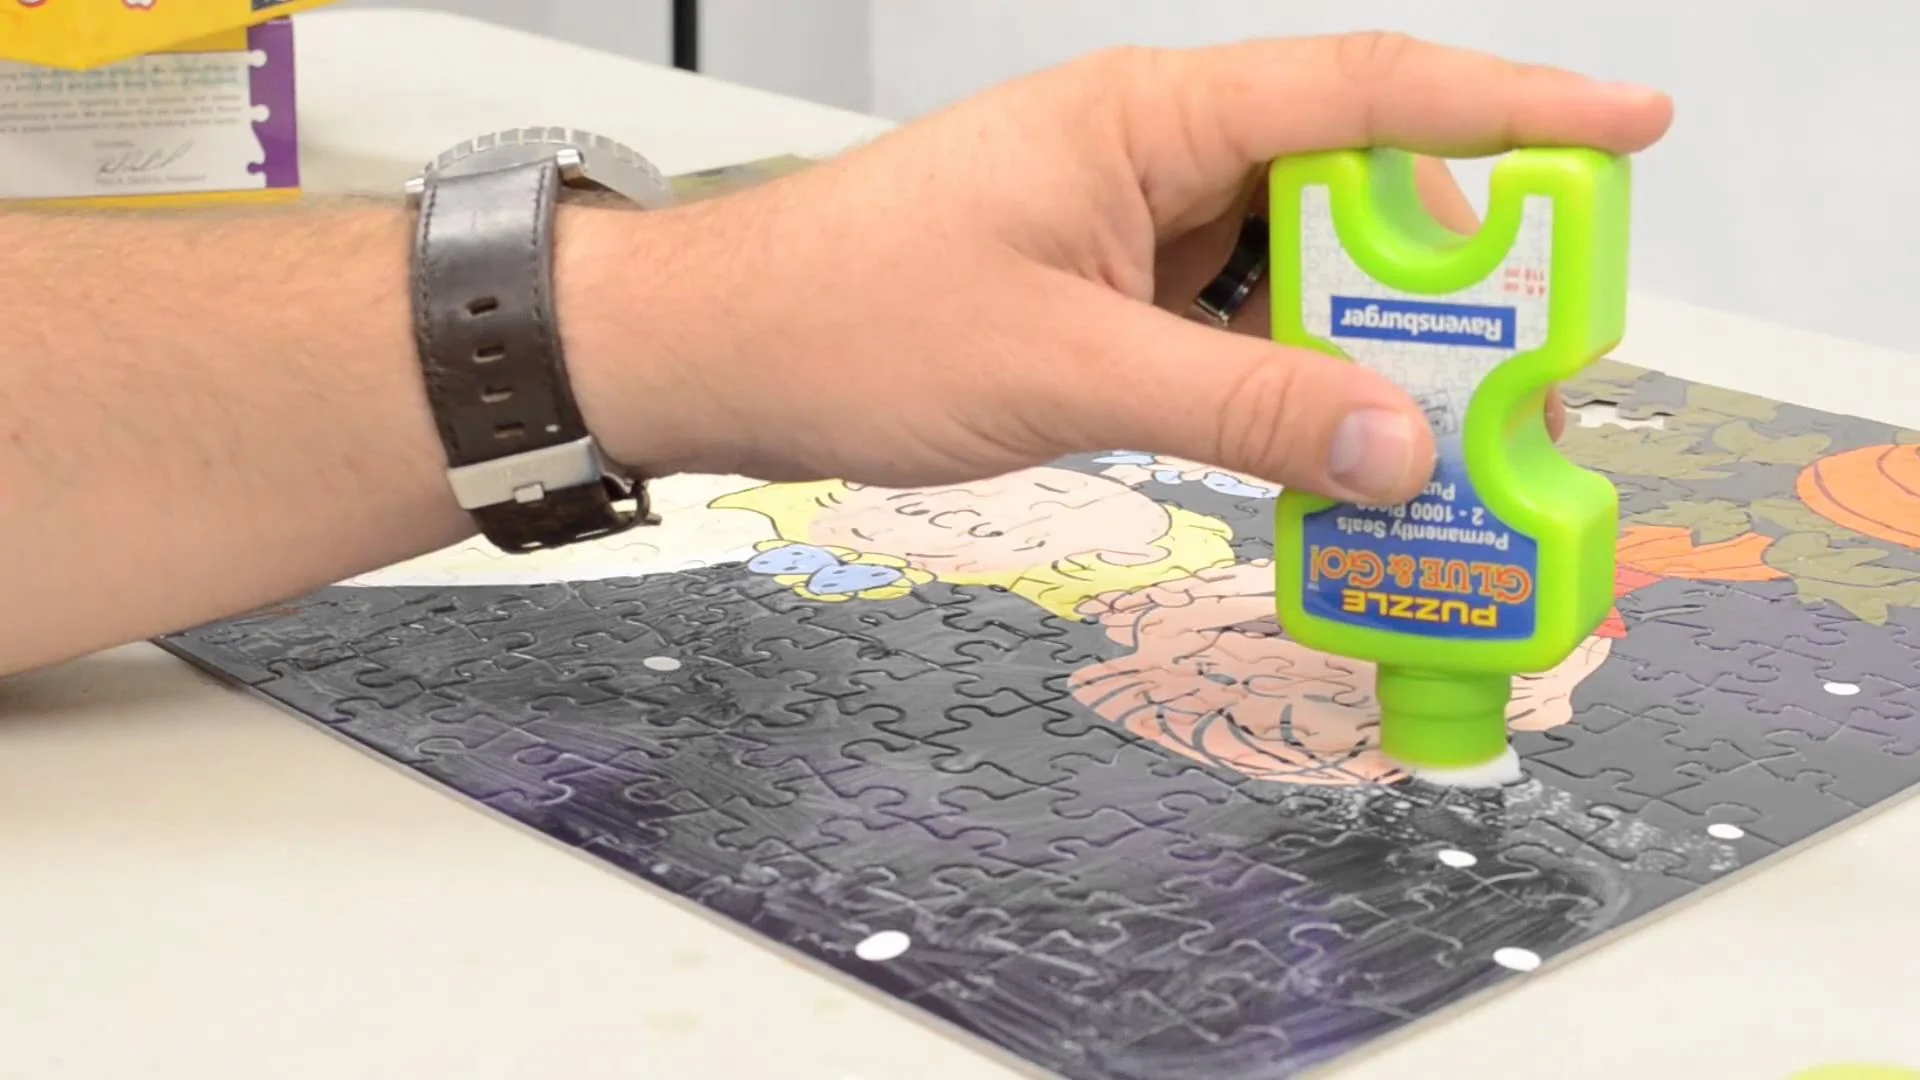
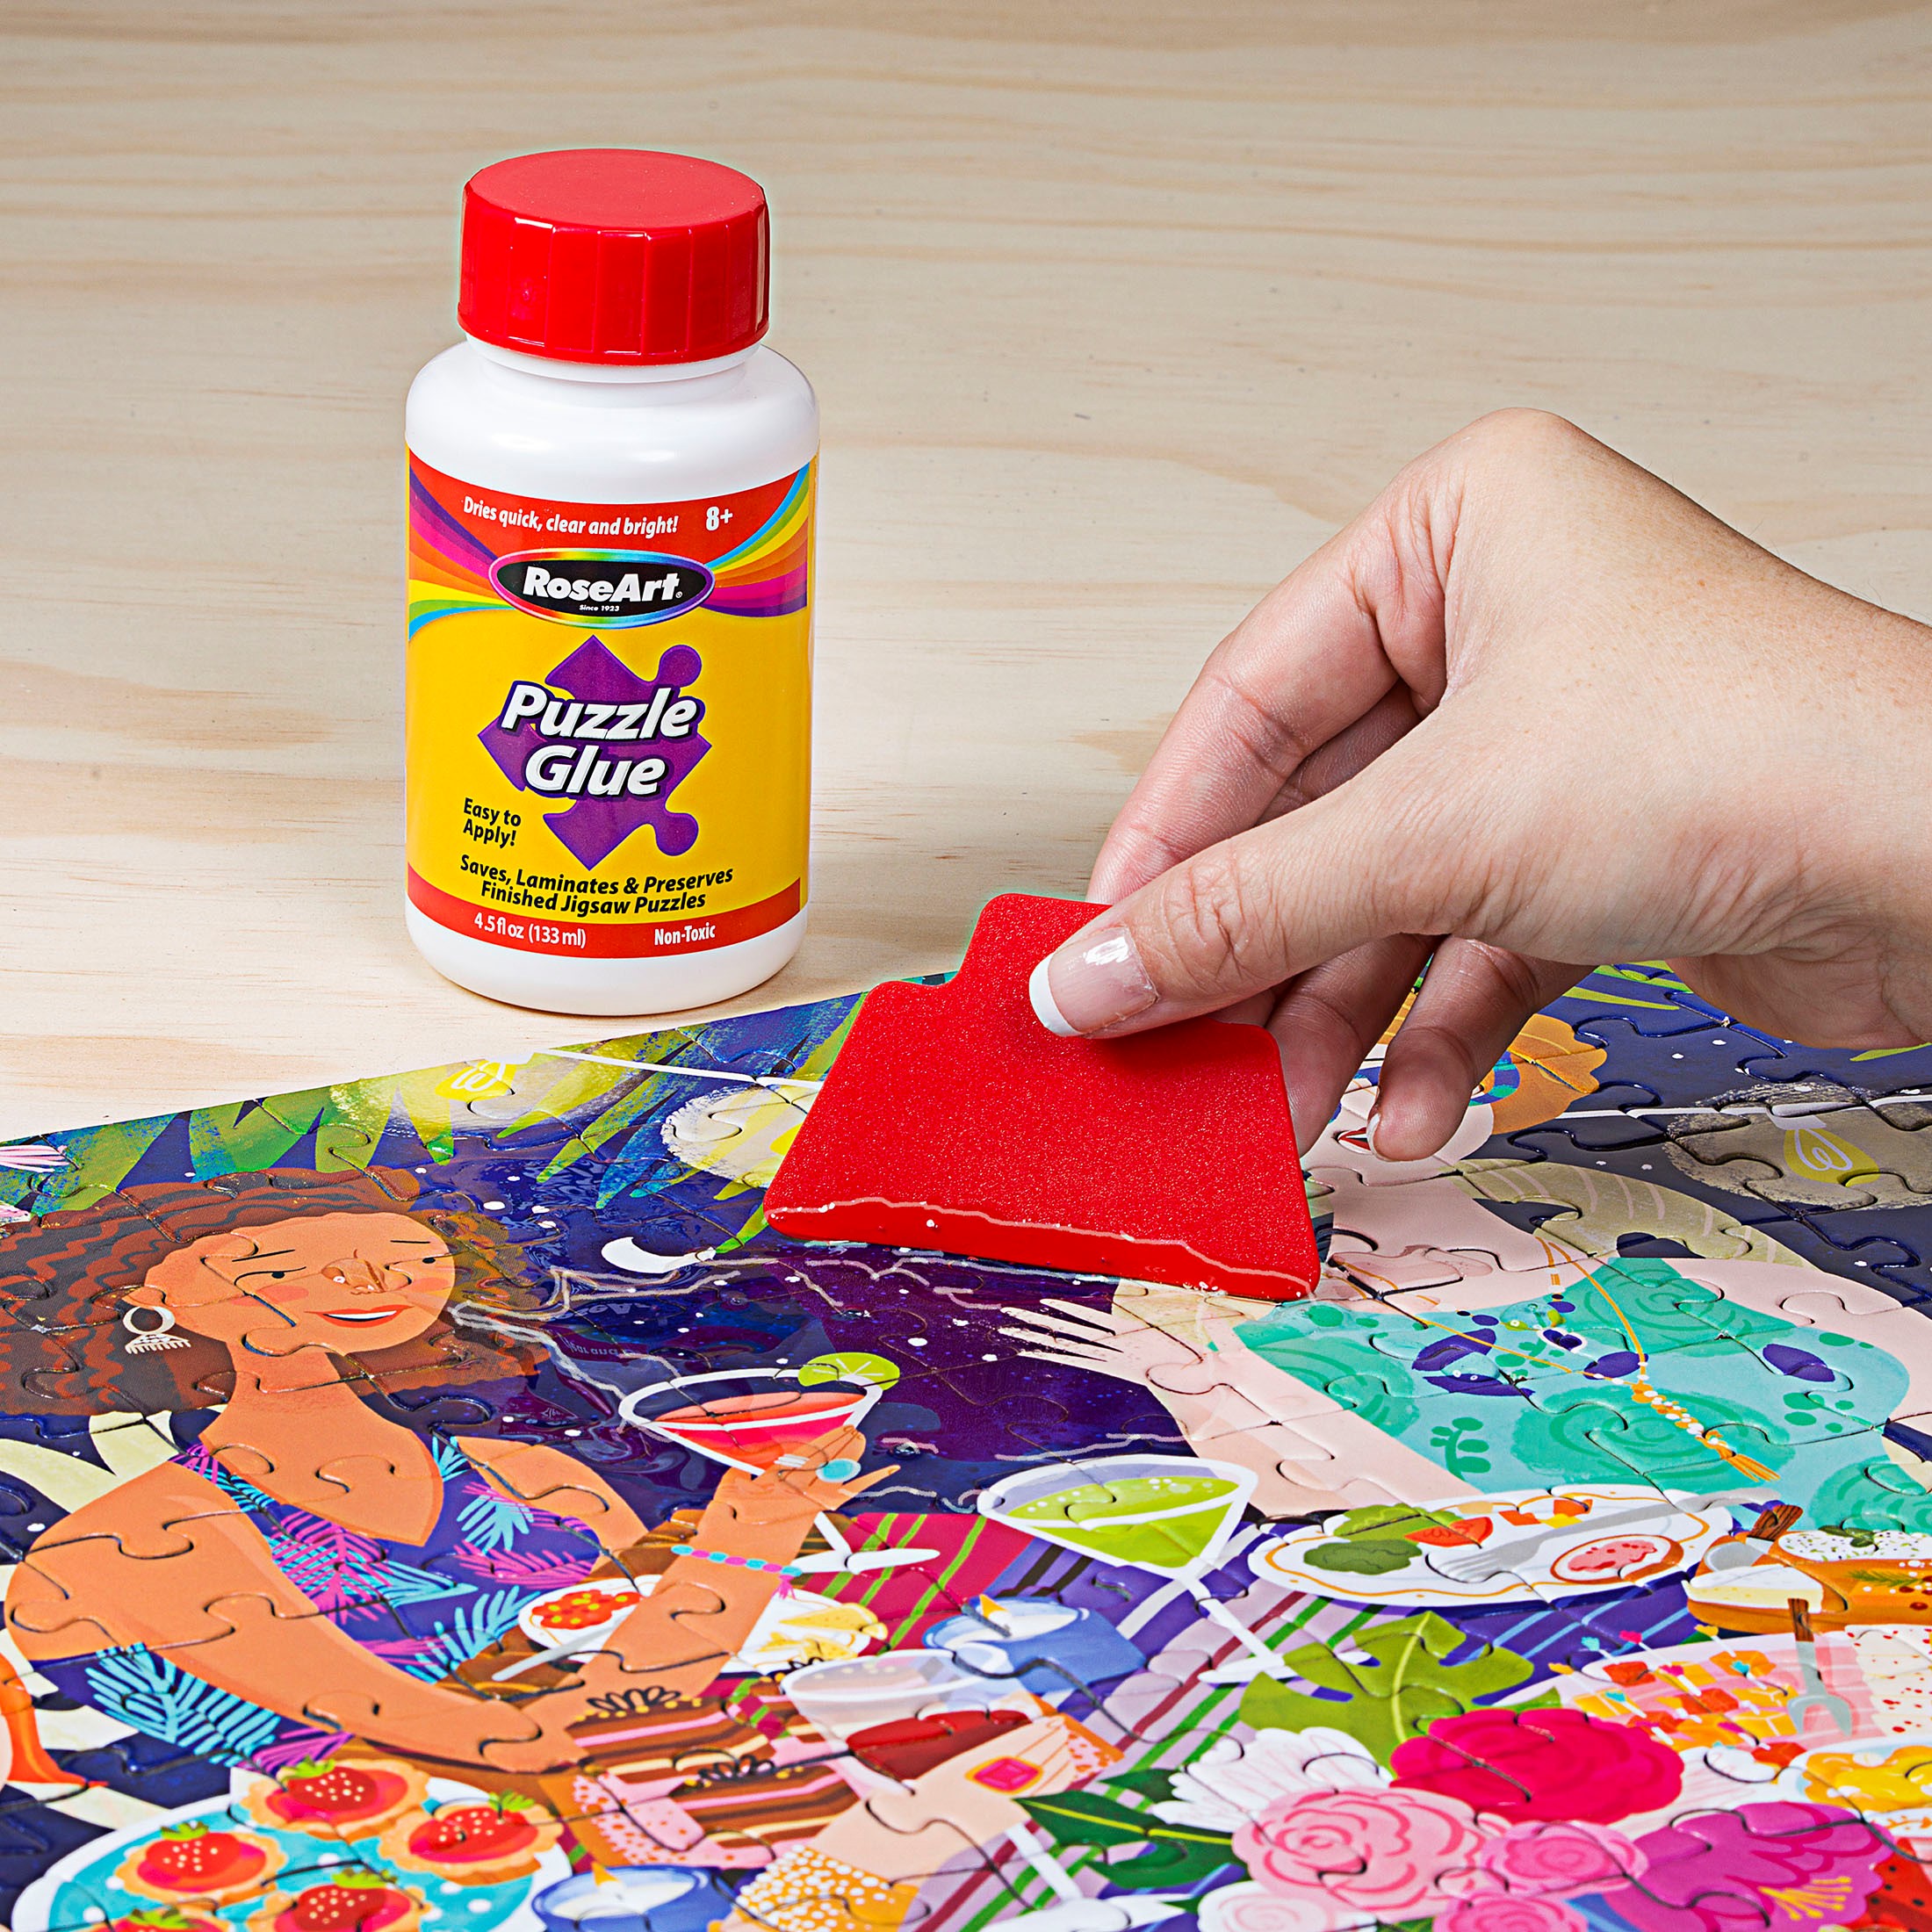
- Puzzle Glue: You’ll need a special type of glue designed specifically for puzzles. Regular glue can be too thick or may not hold the puzzle together long-term.Puzzle-specific adhesives, like Mod Podge Puzzle Saver or Ravensburger Puzzle Conserver, are ideal because they’re made for this purpose.
- Cardboard or Foam Board: This serves as a solid support, keeping your puzzle together while the glue dries. You can use cardboard, foam core, or a thin piece of plywood.
- Brushes or Applicators: Use a foam brush, paintbrush, or a specialized applicator to evenly spread the glue over the puzzle’s surface. A brush with soft bristles will prevent any streaks or bubbles.
- Wax Paper or Protective Sheet: Protect the surface you’re working on by laying down some wax paper or plastic sheets. This helps keep glue from spilling onto your work surface and prevents the puzzle from sticking to it.
- Scissors: You might need scissors to trim the cardboard or foam backing to fit the size of your puzzle.
Step-by-Step Directions
Now that you’ve gathered your materials, follow these simple steps to glue your puzzle:
How To Glue A Puzzle
1. Prepare Your Puzzle
- Clean the surface: Before you begin, ensure that the puzzle is clean and free of any dust or debris. Wipe it down with a soft cloth to remove any particles that may interfere with the gluing process.
- Place your puzzle on a flat surface: Lay your puzzle flat on a clean, flat surface like a table or desk. This will prevent any bending or warping while you work.
2. Flip The Puzzle Over And Apply The Glue
- Cover the back with wax paper: To avoid getting glue on your work surface, lay wax paper under the puzzle.
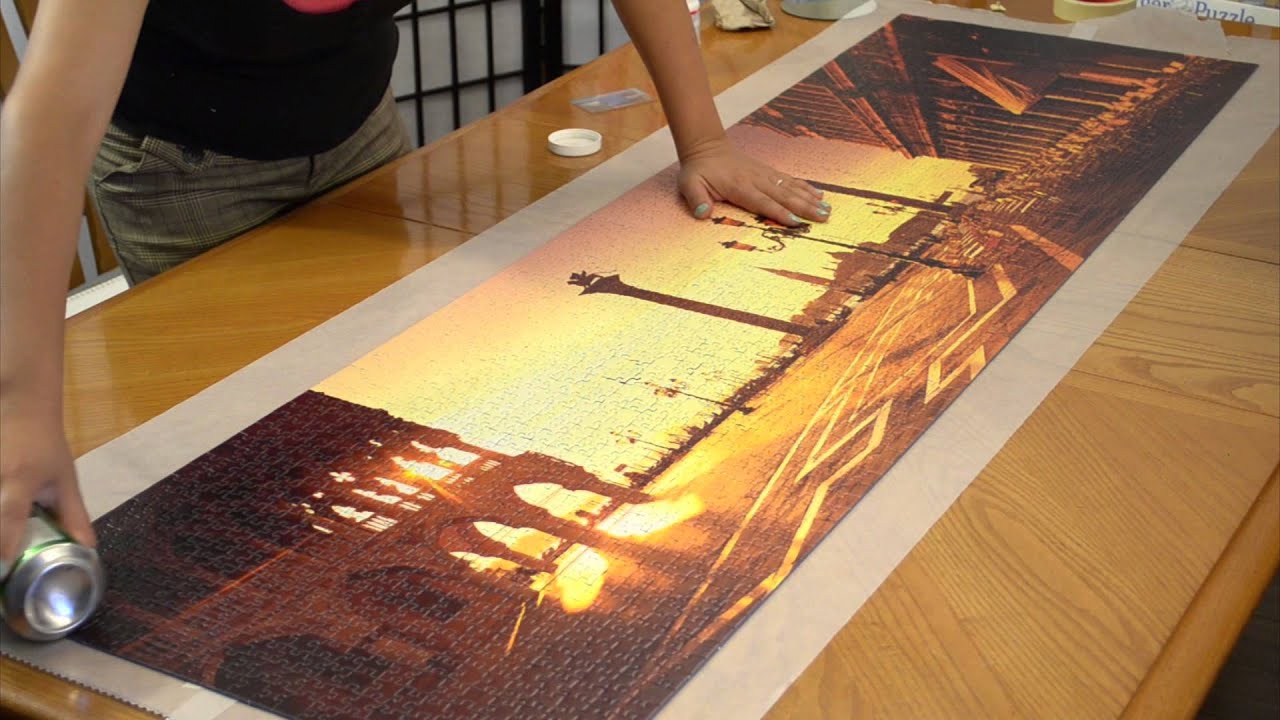
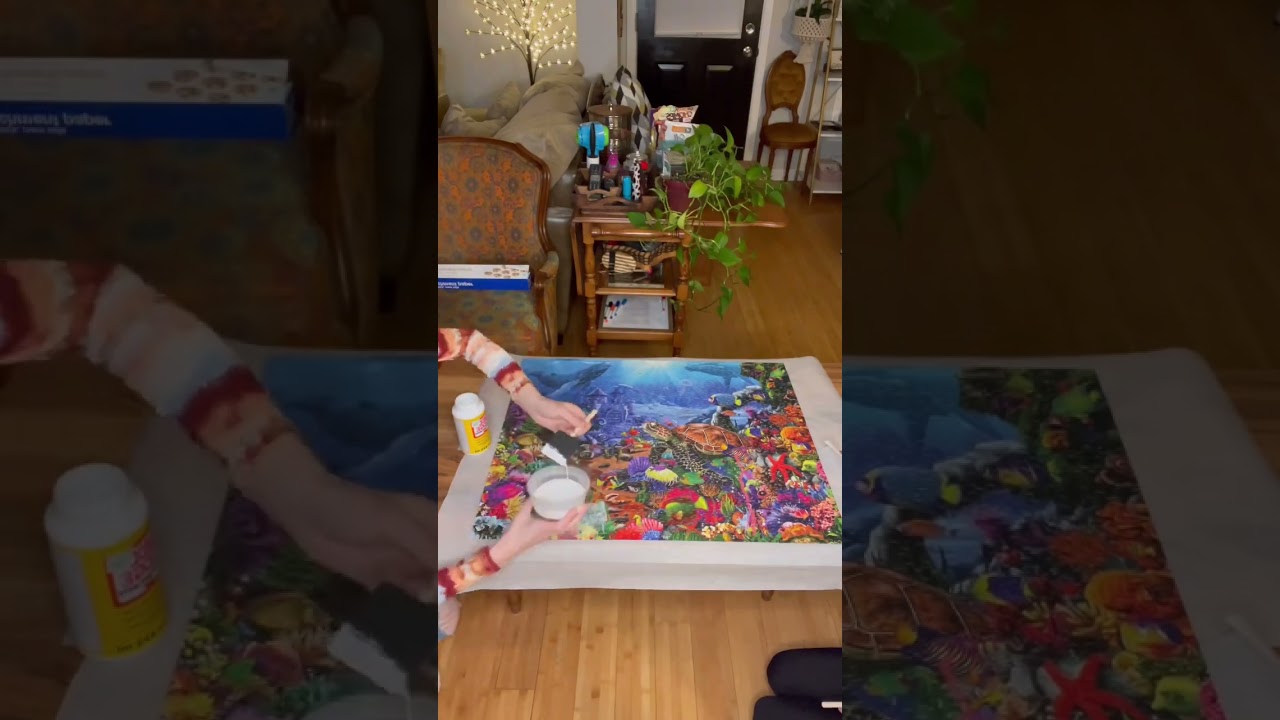
- Start applying the glue: Using your foam brush or paintbrush, gently spread the glue across the back of the puzzle. Apply the glue in thin, even layers, making sure to cover every piece. Work slowly and methodically to avoid over-applying or creating messy spots. Be generous but avoid excessive pooling of glue.
- Allow glue to dry: Let the first coat of glue dry for at least 30 minutes before applying the next layer. This ensures the glue has time to bond and prevents smearing.
3. Apply The Front Coat Of Glue
- Spread glue on the front: After the back has dried, flip the puzzle over and start applying glue to the front. Again, use a foam brush or paintbrush to spread a thin layer of glue across the puzzle’s surface. Start in one corner and work your way across, covering the entire surface.
- Allow the glue to dry: Once you’ve applied the front layer, allow it to dry for 2-3 hours, or follow the instructions on your puzzle glue packaging. You want to ensure the glue is completely dry before moving on to the next step.
4. Mount The Puzzle On The Backing
- Cut the backing to size: Measure and cut your cardboard, foam core, or plywood to fit the exact size of your puzzle. This will serve as a strong backing to support the puzzle.
- Secure the puzzle: Once the puzzle is dry, carefully slide the backing behind it. If you're using puzzle glue with a wet or tacky finish, it will naturally adhere to the backing. However, you can also apply a small amount of glue to the backing to ensure the puzzle sticks to it.
5. Allow For Full Drying
The most important step is to allow the puzzle to dry completely. It’s best to leave it for 24-48 hours, ensuring that all layers of glue have set and the puzzle is securely bonded. Avoid moving the puzzle while it’s drying to prevent shifting or warping.
Common Mistakes To Avoid
While gluing a puzzle may seem straightforward, there are a few common mistakes you should avoid:
- Over-applying glue: Using too much glue can result in unsightly bubbles, streaks, or uneven surfaces. Always use a thin, even layer of glue.
- Not letting glue dry completely: Be patient and allow each layer of glue to dry fully. Rushing through the process can cause the glue to smear or the puzzle to fall apart.
- Using the wrong type of glue: Regular craft glue may not bond well with puzzle pieces. Make sure to use a glue specifically designed for puzzles to get the best results.
- Not protecting your work surface: Make sure to use wax paper or plastic sheets to protect your tableor work surface from sticky glue.
How To Frame A Glued Puzzle
Once your puzzle is glued and ready, displaying it can be just as rewarding as the assembly process itself. To ensure your puzzle stays intact and doesn’t warp, it’s best to mount it to a backer board before hanging it.
You can easily find this service at most craft stores, often called “Dry Mounting,” where a special adhesive backer board is used to instantly glue the puzzle into place. This service typically costs around $15. If you'd prefer to do it yourself, here’s a simple method to mount your puzzle at home.
What You'll Need:
- Wax paper
- A rolling pin
- A pencil
- A ruler
- Razor blade
- Spray adhesive
- 1/4" foam board
Step-by-Step Mounting Process
- Prepare the Puzzle: Start by placing wax paper underneath the glued puzzle. Use a rolling pin to flatten the puzzle as much as possible, ensuring it lies completely flat.
- Outline the Puzzle: Position your puzzle onto the foam board and lightly trace the outline with a pencil. Make sure the outline stays just inside the puzzle’s edges, so the board remains hidden once the puzzle is mounted.
- Cut the Foam Board: Using a ruler and razor blade, carefully cut the foam board along the pencil lines, ensuring a straight and even edge.
- Apply Spray Adhesive: In a well-ventilated area, apply spray adhesive to the back of the puzzle. Be sure to follow the directions for drying time, as spray adhesives set faster than liquid glue. Once sprayed, press the puzzle onto the foam board. To ensure it adheres well, use a rolling pin to gently press down across the puzzle. For larger puzzles, you may need to apply some weight on top to ensure the puzzle stays flat as the glue dries.
Framed puzzles can also serve as a reflection of your favorite memories, including landmarks or scenes from the best citiesyou’ve visited, turning them into meaningful home decor.
Hanging Your Puzzle
- Using Picture Hanging Strips: If you want to avoid putting holes in your wall, 3M picture hanging strips are an excellent choice. They’re easy to use and strong enough to hold your completed puzzle securely.
- Crafting a Wire Hanger: For a traditional touch, create a wire hanger with 20-gauge craft wire. Cut two small holes in the foam board near the top, thread the wire through, and knot it securely. Leave enough slack to balance the frame, trim excess wire, and your hanger is ready.
- Using a Puzzle Frame: If DIY isn’t your thing, a pre-made puzzle frame can be a quick and easy solution. To protect your puzzle during transportation to the framing store, sandwich it between two pieces of cardboard. It’s a good idea to first dry mount the puzzle or mount it on foam board before framing for added durability.
Pro tip:Adding a card readingtheme to your framed puzzle can make it a unique and personal decorative piece.
FAQs
Can I Use Regular Glue For Puzzles?
It’s not recommended to use regular glue for puzzles, as it may not hold the pieces together properly and can create a messy finish. Puzzle-specific glue is ideal because it dries clear and holds the pieces securely.
How Long Does The Glue Take To Dry?
Drying time depends on the type of glue used, but typically, you should allow the back of the puzzle to dry for at least 30 minutes before applying the front layer. After the final coat, let the puzzle dry for 24-48 hours for the best results.
Can I Glue A Puzzle Without A Backing Board?
While it’s technically possible to glue a puzzle without a backing board, it’s not recommended. The backing board adds structure and stability to the puzzle, preventing it from warping over time.
How Do I Prevent My Puzzle From Shifting While The Glue Dries?
To keep your puzzle from shifting while drying, consider using wax paper underneath to prevent sticking.
Can I Glue Large Puzzles, Or Is It Just For Smaller Ones?
You can glue puzzles of any size. However, for larger puzzles, it may be more difficult to handle the puzzle without pieces moving or shifting.
Final Thoughts
Gluing a puzzle is a rewarding process that results in something beautiful and memorable. By following the right steps, using the right materials above, and taking your time, you can ensure that your puzzle stays intact for years to come.

Celeste Pearl
Author
Celeste Pearl is an accomplished writer and expert in numerology, astrology, and spirituality.
With a Bachelor of Arts in Journalism and over 6 years of writing experience, Celeste brings a wealth of expertise to her articles, making complex topics accessible and engaging for readers.
Her passion for metaphysical sciences is evident in her insightful content, where she explores the depths of these subjects with clarity and depth.
Beyond her professional pursuits, Celeste enjoys delving into spiritual practices and connecting with nature for inspiration.

Kelly Hayes
Reviewer
Kelly Hayes is a seasoned journalist with over 10 years of experience, specializing in news reporting and horoscope analysis. She holds a Bachelor's degree in Journalism from New York University, enhancing her credibility and expertise in the field.
Kelly's writing style is characterized by clarity, depth, and a commitment to delivering credible information. Her published works across various platforms showcase her knack for engaging storytelling and insightful analysis.
Readers trust Kelly's expertise in both current events and astrological interpretations, making her a sought-after authority in journalism.
Apart from her professional activities, Kelly enjoys exploring new cultures, practicing yoga, and engaging in philanthropic activities.
Latest Articles
Popular Articles